Yes, I still love opals!
Ok! So, at my class in October I cut an Ethiopian opal (actually I cut 2) that has changed a lot over time. We learned that Ethiopian opals in particular have water content issues called hydrophane.
One of the stones was clear when I received it, and if you put it in water and looked very closely you would see a red flash. In the months (it seriously took over a month) since class it has turned a milky white color with a pretty red flash that is prominent. I have explained the change to people when they see the stone, but I don't think they fully understand the dramatic nature of it. And hey, I get it, they weren't there. But look at this!!
I bought a mixed lot of Ethiopian opal online and recently it arrived to me. It was sold to me by weight, and the largest piece was an (ugly) lumpy no color thing. :/ That's ok, it happens, and that is the risk you take buying things this way. Also, there are a lot of lovely (smaller) pieces too.

Do you see the large lumpy piece and the milky blue piece I circled?
Today I was looking at them and thinking again about the ugly lumpy one, and thinking that it was 'potch' (unprecious material found around opal, or basically opal but without any color play) Usually potch is something you grind off of a stone and don't want. So, it's particularly annoying to have a giant piece of it in a lot sold by weight. Oh well.
And then I thought, 'I wonder if it will change in water.' So I took it and the milky blue one and put them in water. After a few minutes I looked at them:

Look at the how the water is absorbing into the stone!! Changing it to transparent! And here it is a few hours later:

Notice that the milky blue is now a transparent green.
Our friend Lumpy:

and our friend Milky Blue:

And well, even though Lumpy went transparent for me, still no play of color, making it an ugly piece I'm unlikely to cut, BUT, I am excited to have visuals to share showing the changes that happen with hydrophane material!!

 And it was fun and exciting, and maybe just a little addicting. I left my machines set up, because I was tired and figured I would clean and tidy everything in the morning.And then this morning I got up early and thought, 'Maybe while it's all still set up I could cut a few more...' So I made these:
 And then after photographing them and before cleaning everything up, I thought, 'You know, it would be a shame to put everything away without playing with the Coober Pedy...' So I cut some of that too:
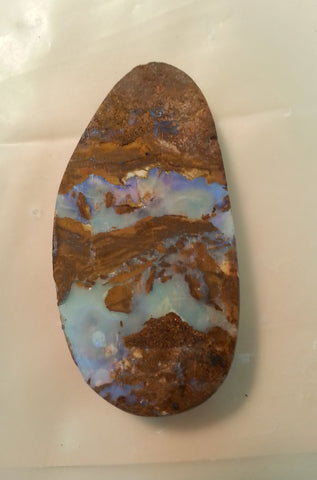
 And then I had lunch, and started putting together a list of things to work on this afternoon/evening. But a funny thing happened when I went back into my studio. I thought, 'You know, It'd be a shame to leave out the Mexican opal.' the other part of my brain replied, 'Yeah, but you'd have to use the saw on them first, and you didn't set it up yet, and then you'd have to clean it up...It would be a bigger mess.' So I replied to myself, 'You are right. If I am going to go to the trouble messing with the saw, I might as well cut some of the boulder opal too...' And then this happened:
 And it was 7:30pm. So THIS is what I did today. I cut 31 stones!
 And if I include last night....:
 So. I still have to clean up the big mess, and I need to get busy setting some stones!


